Managing Conversations
Learn how to filter, assign, open, close, and manage conversations in the Replyn inbox.
Conversations are the core unit of the inbox. Each conversation represents an ongoing thread between your business and a customer on a specific channel. This page covers how to navigate, organize, and manage your conversations effectively.
Conversation List
The left panel of the inbox displays all your conversations. Each entry shows the contact name, the most recent message preview, the timestamp, and the channel icon.
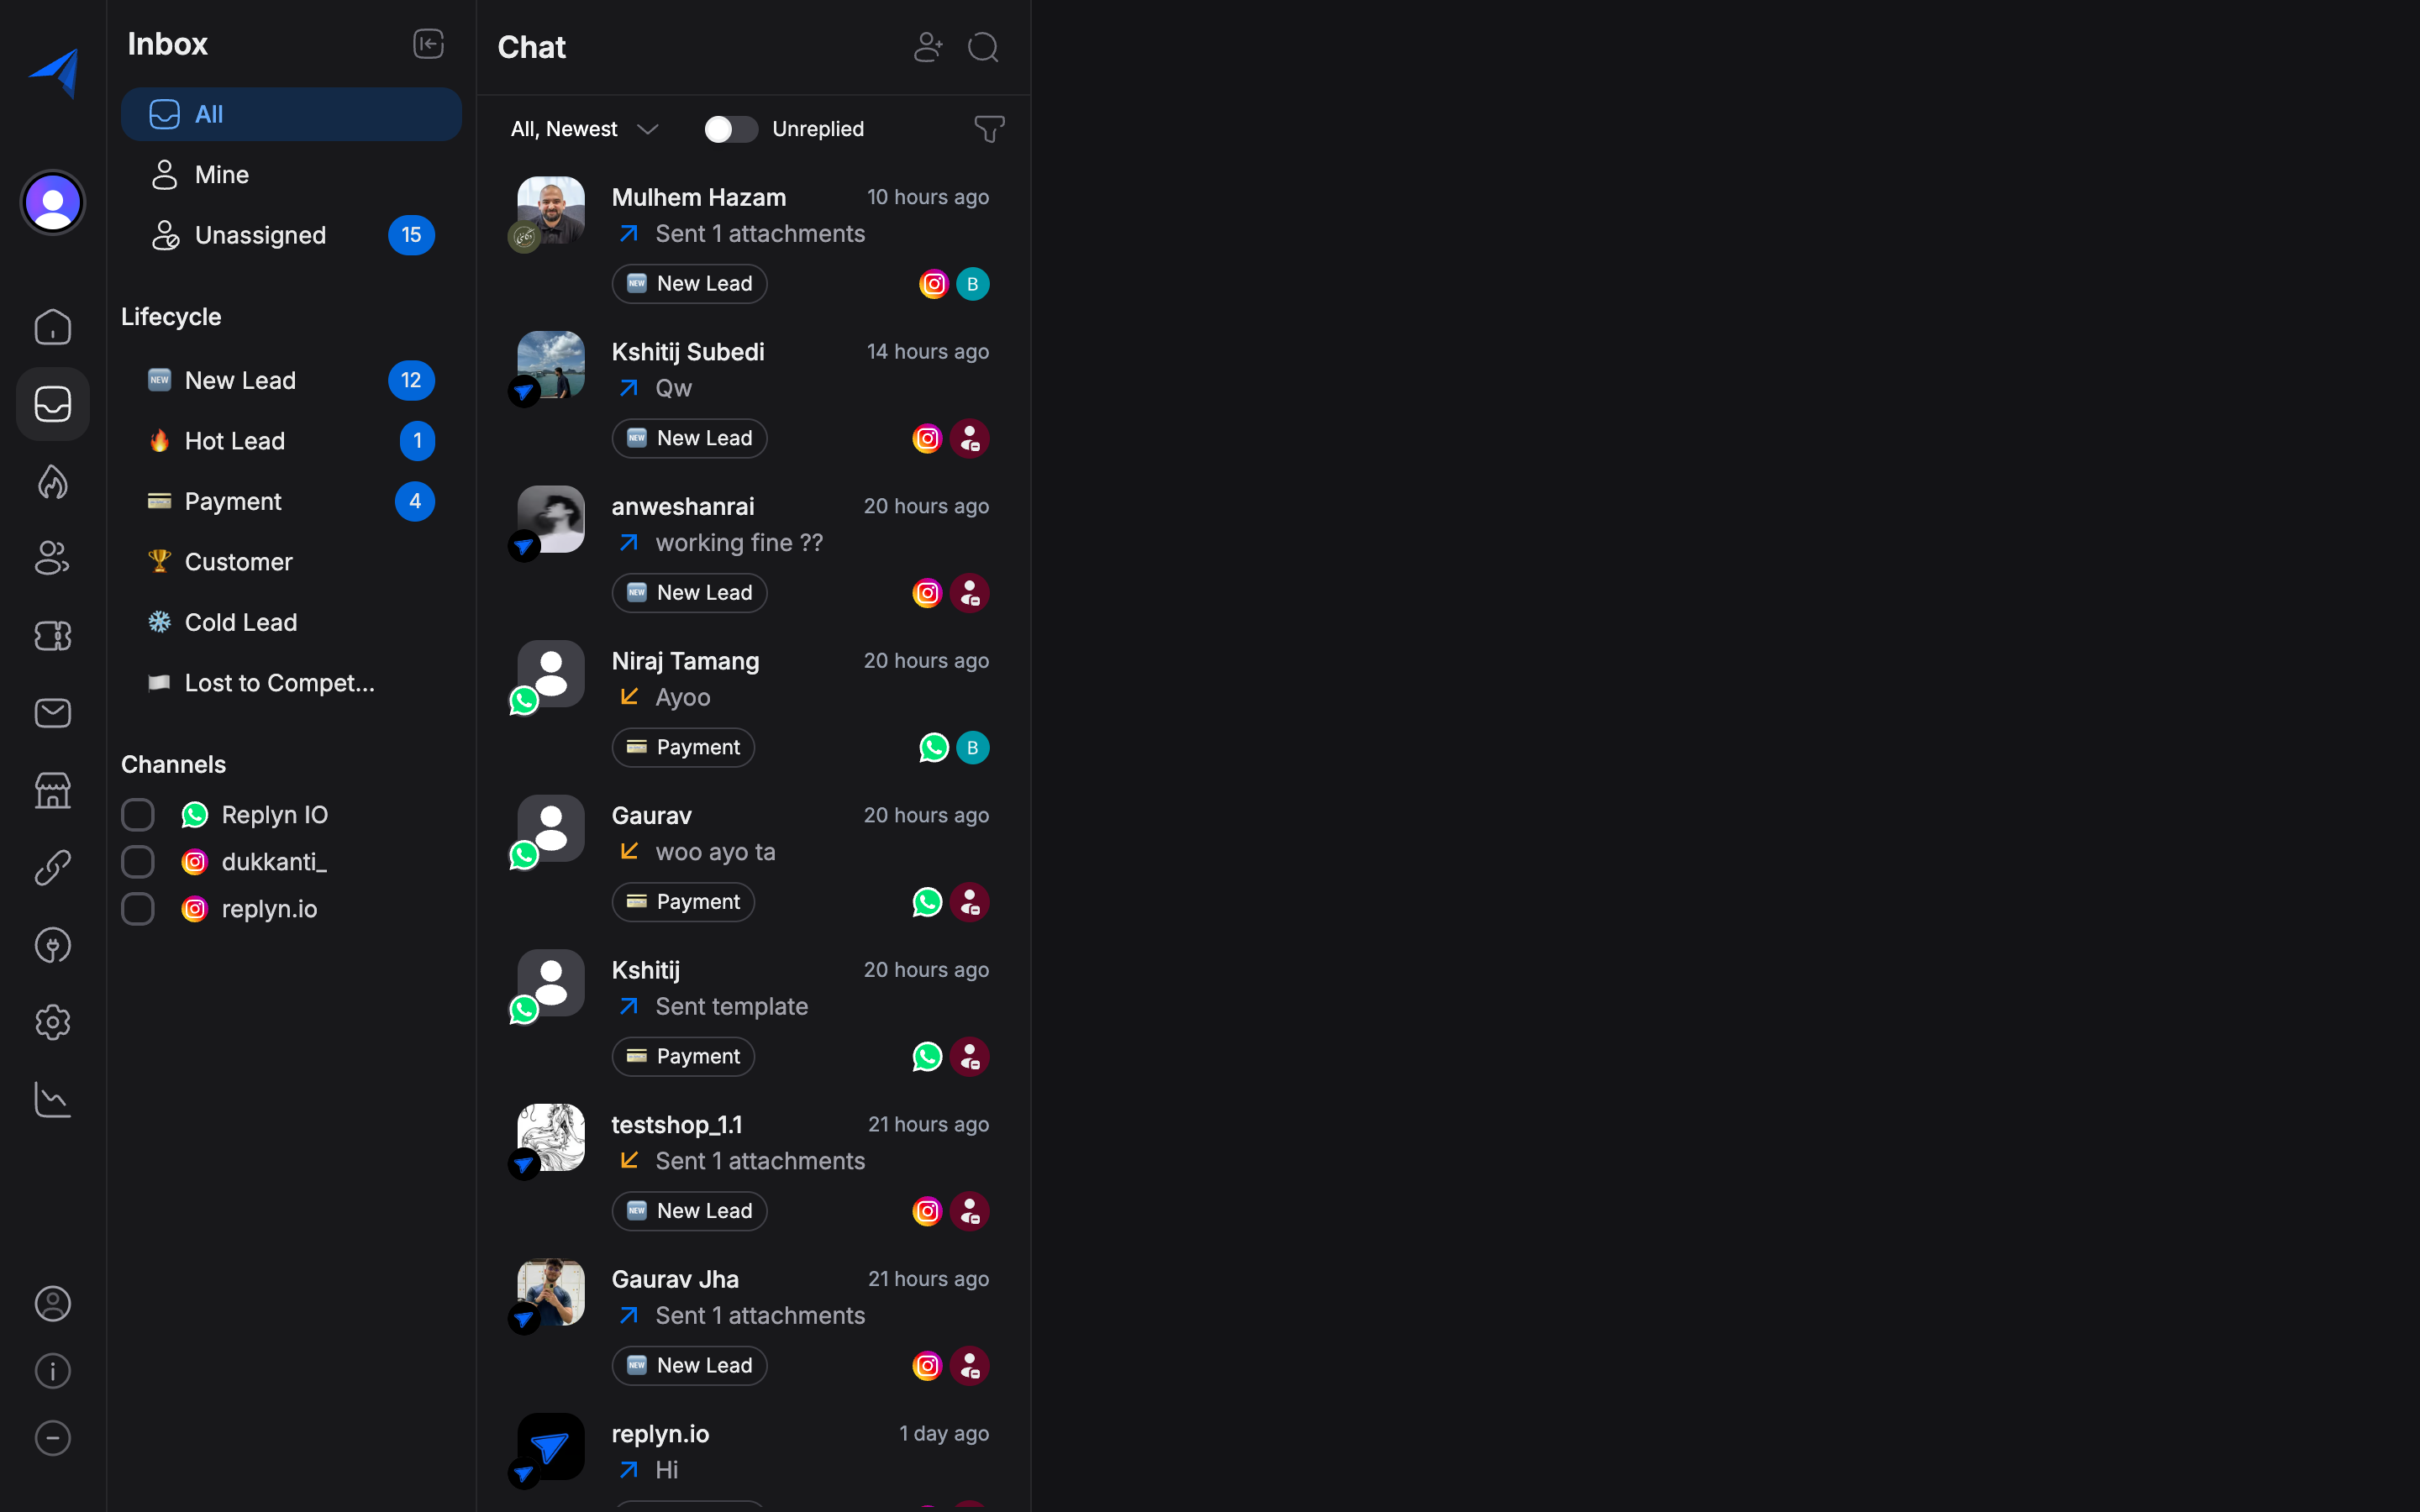
Filtering Conversations
Use the filter controls at the top of the conversation list to narrow down what you see.
| Filter | Description |
|---|---|
| Open | Conversations that are active and awaiting a response or action. |
| Closed | Conversations that have been resolved and marked as closed. |
| Assigned | Conversations assigned to a specific team member. |
| Unassigned | Conversations that have not been assigned to anyone yet. |
You can combine filters to find exactly what you need. For example, filter by Open and Unassigned to see conversations that need someone to pick them up.
Admins see all conversations by default. Agents only see conversations assigned to them unless their role permissions grant broader access.
Searching Conversations
Use the search bar to find conversations by contact name, phone number, or message content. Search results update in real time as you type.
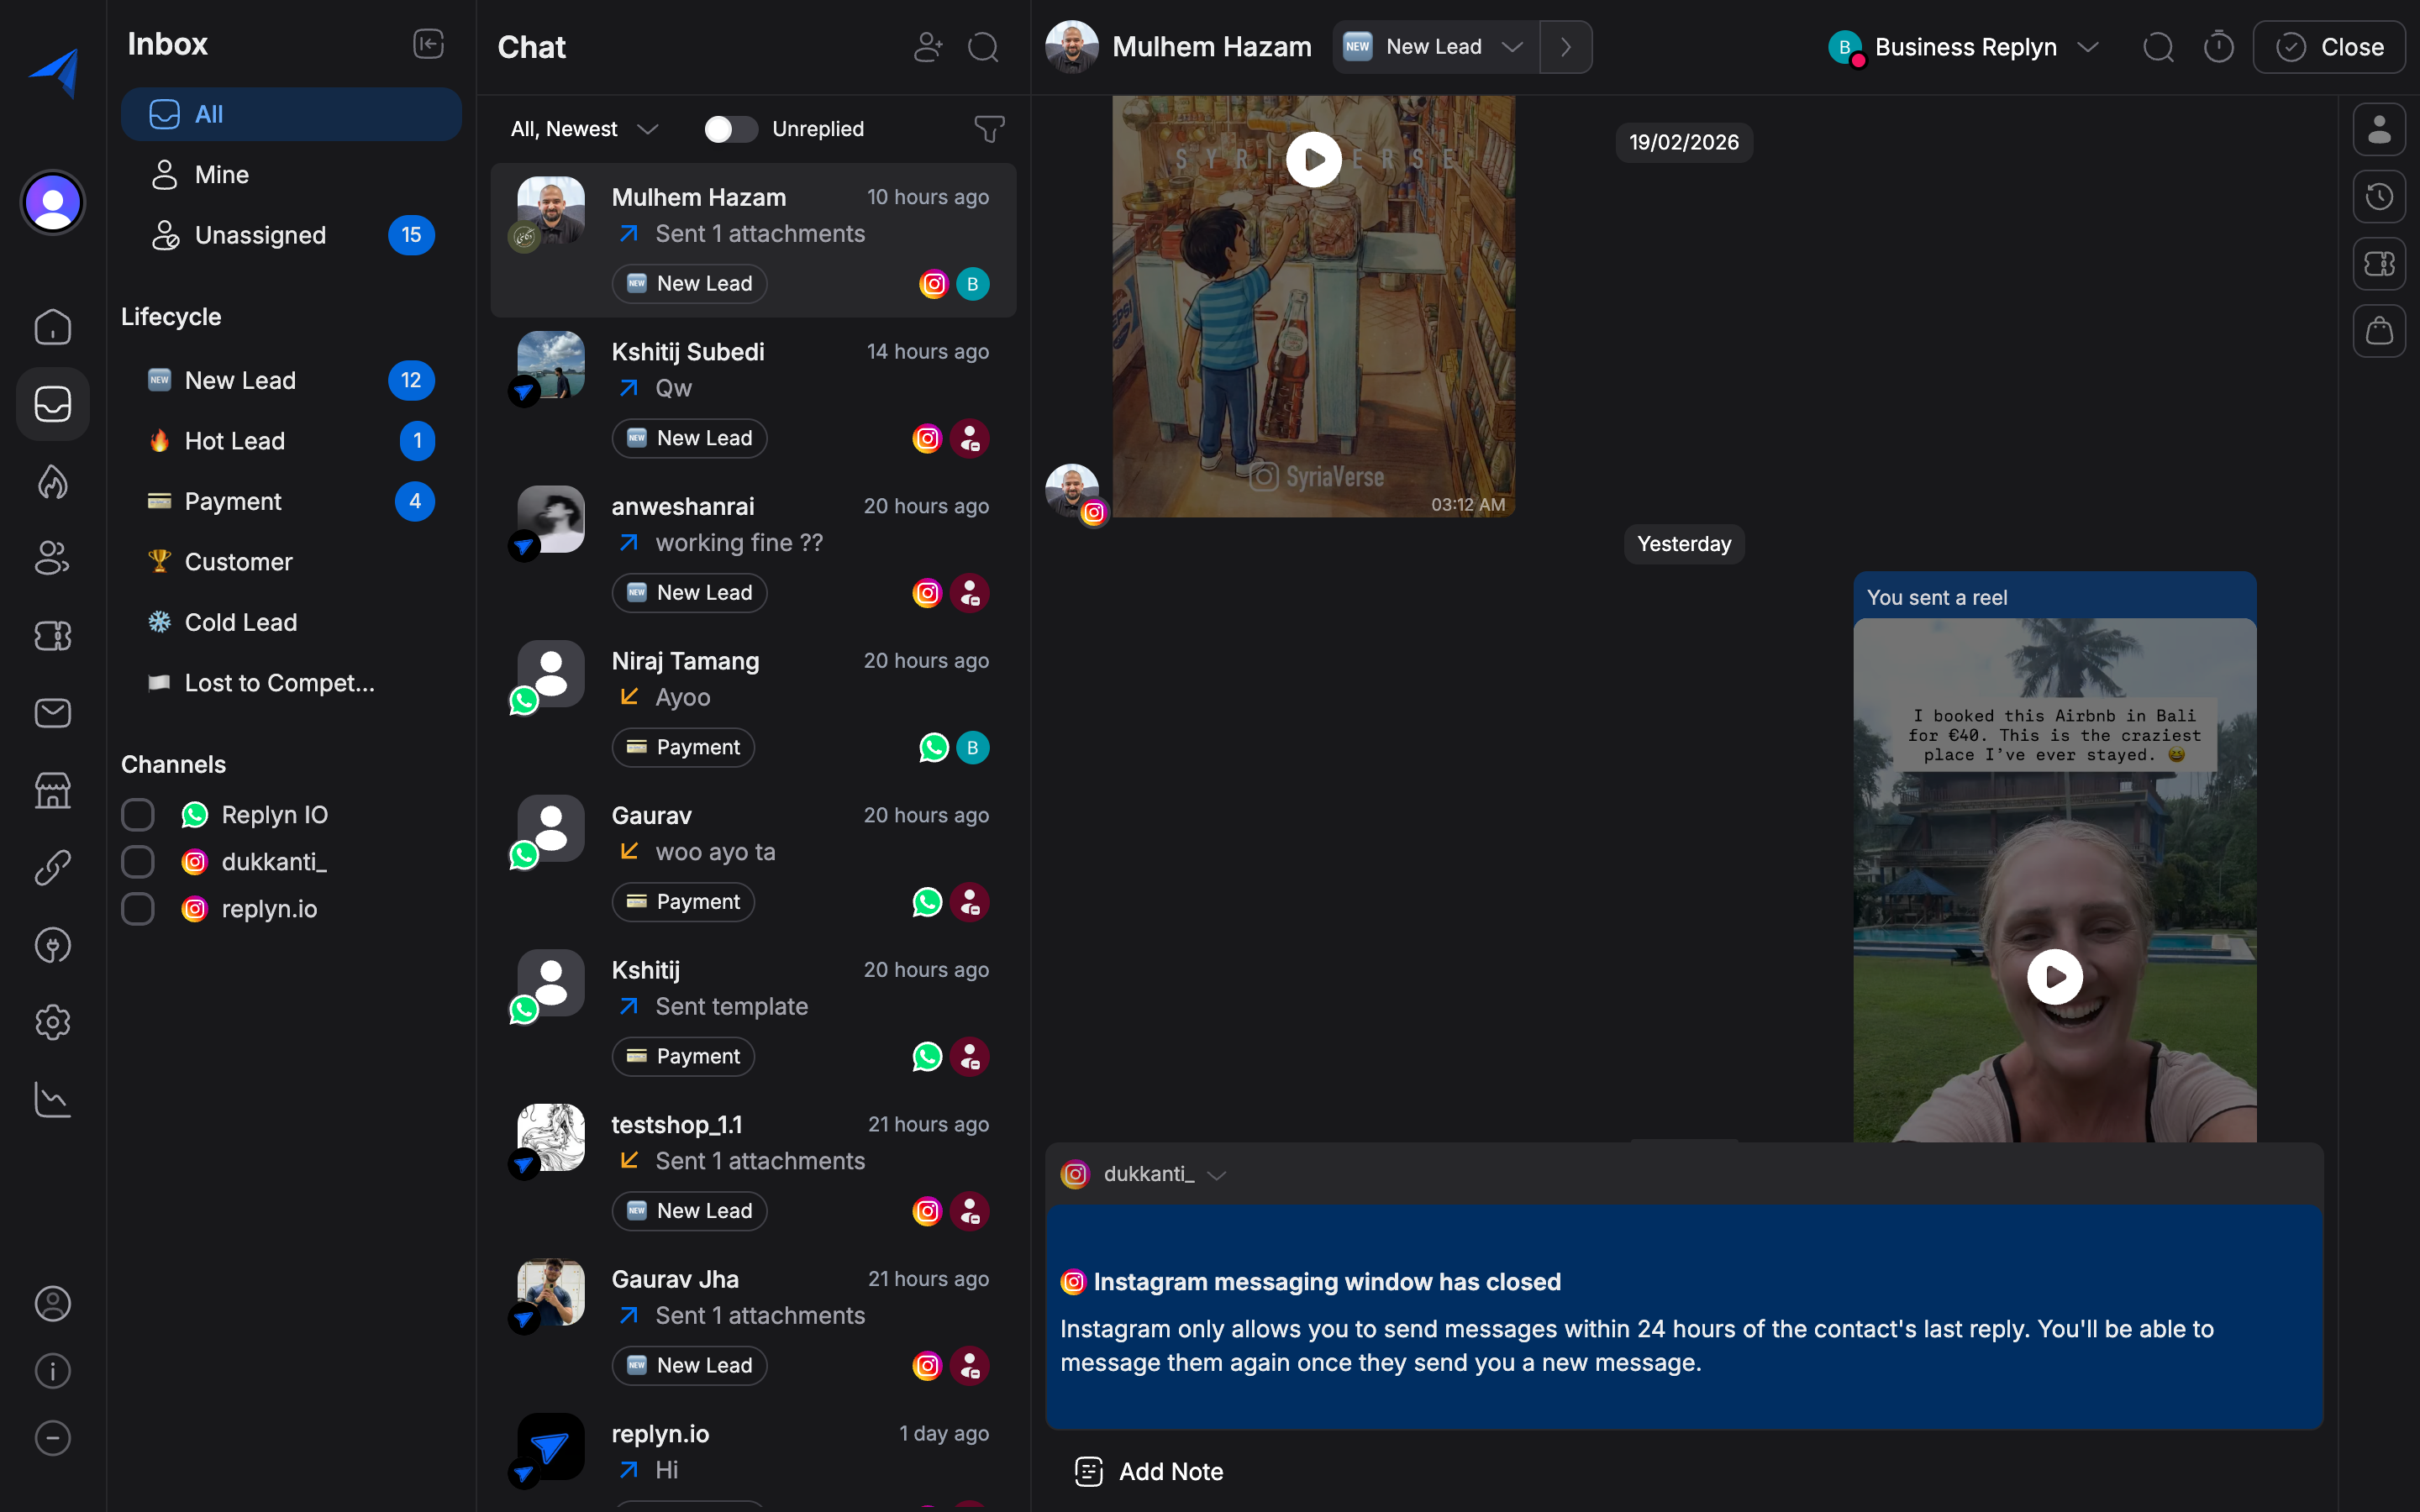
Opening and Reading Conversations
Click any conversation in the list to open it in the main panel. The conversation view shows the full message history in chronological order, with your outgoing messages on the right and incoming messages on the left.

Each message displays:
- The message content (text, image, document, audio, or video)
- The timestamp
- The delivery status icon (sent, delivered, read, or failed)
- The channel through which the message was sent or received
Assigning Conversations
Assigning a conversation to a team member ensures accountability and prevents duplicate replies.
Click the Assign button in the conversation header, or open the details sidebar and locate the Assigned To field.
Select a team member from the dropdown list. You can search by name to find the right person quickly.
The conversation is now assigned. The selected team member will receive a notification and the conversation will appear under their Assigned filter.
Reassigning a conversation does not notify the previously assigned agent. Communicate the handoff to your team if necessary.
Closing Conversations
When a conversation is resolved, close it to keep your inbox organized.
A dialog appears prompting you to add a closing note. Describe the resolution or outcome (e.g., "Issue resolved, refund processed" or "Appointment confirmed for March 5"). This note is saved to the conversation history for future reference.
Click Confirm to close the conversation. It moves from the Open list to the Closed list.
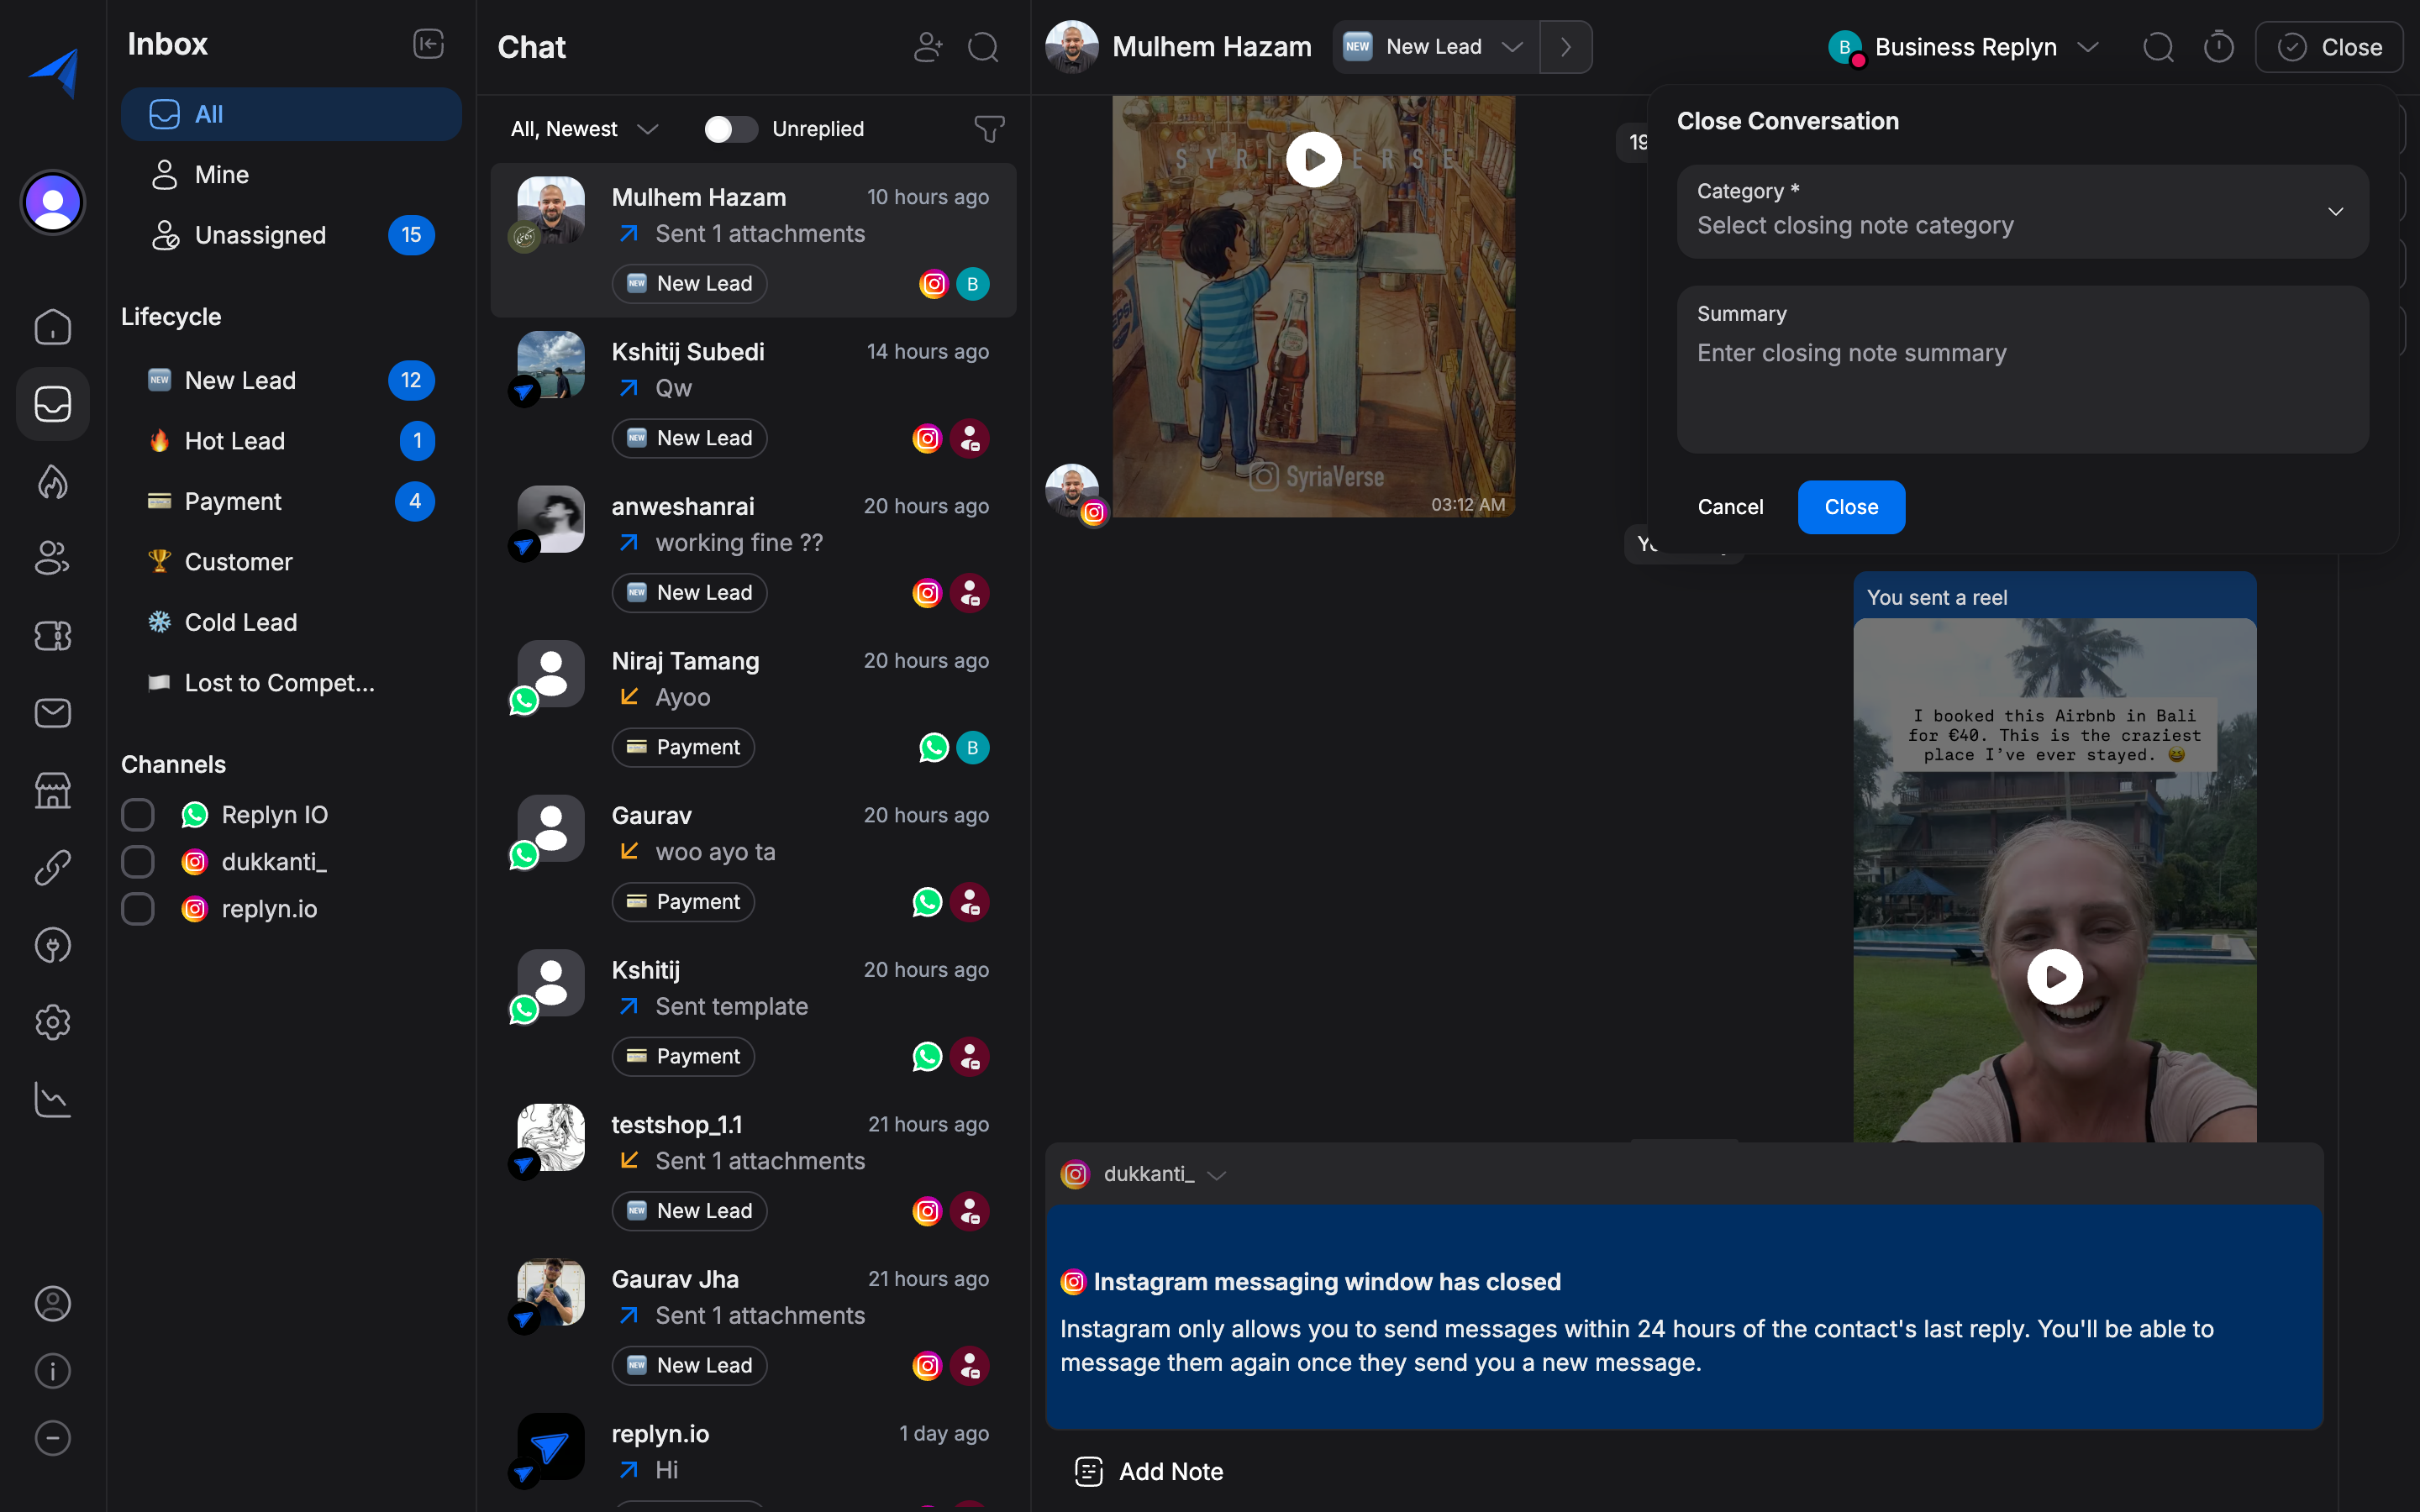
Closed conversations reopen automatically if the customer sends a new message.
Conversation Details Sidebar
The right-side panel provides context about the conversation and the contact. Click the contact name or the details icon to expand the sidebar.
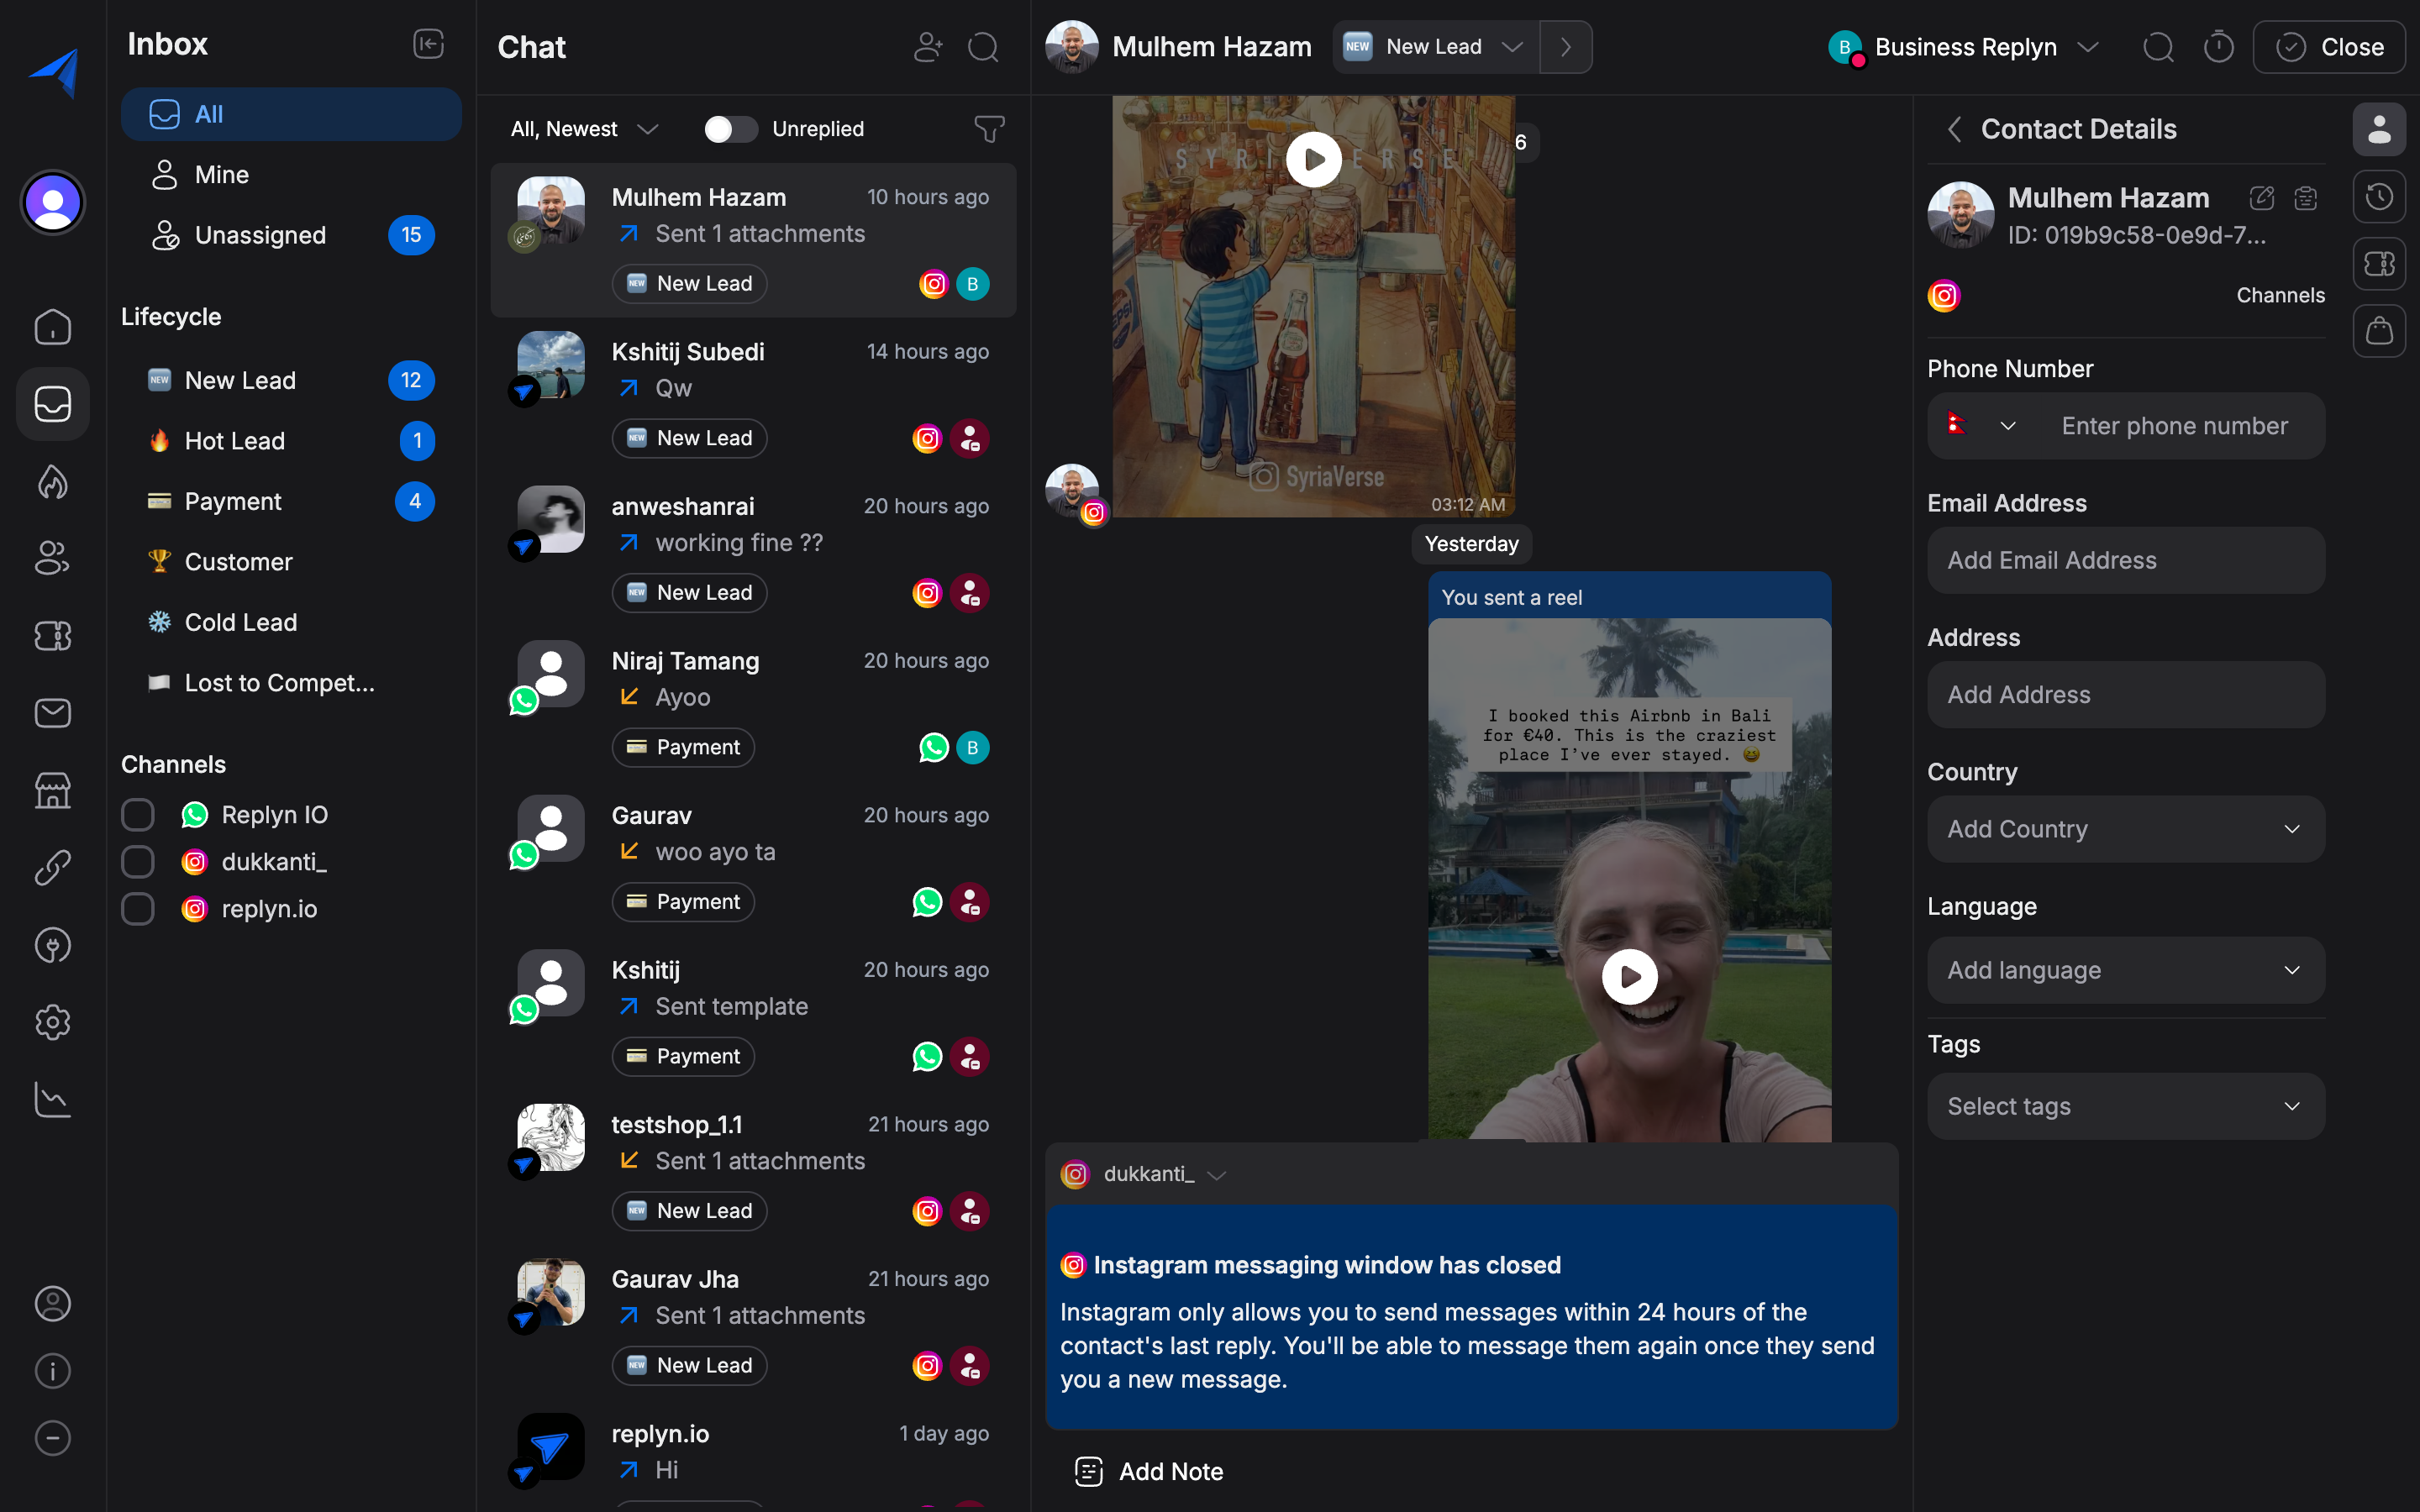
The sidebar includes:
Contact Information
- Name and phone number
- Email address (if available)
- Channel the conversation is on
- Link to the full contact profile
Tags
Apply tags to conversations for categorization and reporting. Tags help you segment conversations by topic, urgency, or department. Click the Add Tag button and select from your existing tags or create a new one.
Lifecycle Stage
View and update the contact's lifecycle stage directly from the sidebar. Stages such as New, Lead, Opportunity, Customer, and Churned help your team understand where the contact stands in your pipeline.
Conversation History
Scroll through all past conversations with this contact across every channel. This gives your team full context before responding.